Feeds:
Posts
Comments

Apple Custard Tart

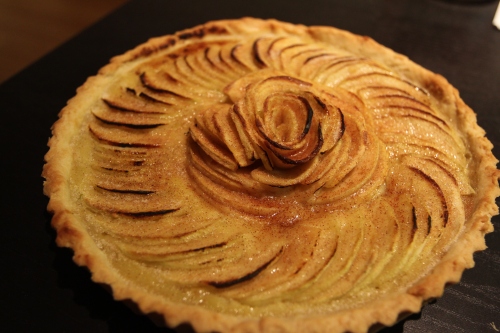
There is no better way to celebrate Fall and the apple season by making an apple tart…

For my version, I decided to make a custard apple tart, though you most certainly don’t have to use the custard..the possibilities are endless.

And if you’re in a rush or simply fear making your own crust, you can use unbaked store bought pie crust and put it onto your tart pan.

After making this tart, your house will be filled with the warm smell of apples and cinnamon…..mmmmmm…

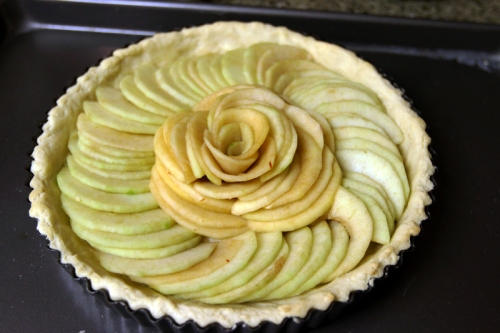
I made a flower design in the middle with the apples…you can decorate as you wish. The trick to make the flower is to cut your apple slices thinner so they can bend without snapping. I found it easier to start decorating from the middle…

Apple Custard Tart

Crust:

3/4 cup butter, softened
1/2 cup confectioner’s sugar
2 cups all purpose flour


1. Preheat oven to 300 degrees F.
2. In a large bowl, combine butter and confectioner’s sugar until light and fluffy.
3. Gradually add in all the flour until just incorporated. If the dough is too sticky, add more flour until consistency is right.
4. Roll out the dough onto your tart pan bake for about 10-15 minutes, or until lightly browned, using pie weights to prevent the bottom from puffing up. If the dough is too hard to work with, put it into the freezer for about 15 minutes to let it firm up.

Apples

1 1/2 lbs firm textured apples (I used Granny Smith)
4 tbsp granulated sugar (Use more if you feel that your apples aren’t sweet enough)
1/2 tbsp cinnamon
1/4 tsp nutmeg

1. Peel, core apples and cut into thin slices
2. Sprinkle granulated sugar, cinnamon, and nutmeg onto the apples and toss until completely coated.

KITCHEN NOTES: Peeling, coring, and cutting apples can be a long process. Keep your apples from turning brown by submerging your cut pieces in a bowl of cold water with the juice of a lemon in it. Be sure to drain the water completely and make sure most of your apple pieces are dry before coating your apples with the sugar/cinnamon/nutmeg mixture.

Custard

1/4 cup all purpose flour
1/3 cup granulated sugar
2 large eggs
3/4 cup half and half
1 tsp vanilla extract

1. In a large, bowl, sift flour and sugar together. Mix in eggs, one at a time, and stir with a wooden spoon until a smooth paste forms.
2. In a small saucepan, heat the half and half over medium heat until it just begins to boil, stirring constantly.
3. Remove from heat and slowly whisk into egg mixture.
4. Mix in vanilla extract and set aside until ready to useVARIATION: You may also add a tablespoon of brandy or cognac after mixing in the vanilla to give your custard a bit of a kick ;).


Assembly:
 

2 tbsp of butter, cold and cubed into small pieces1. Arrange your apples onto your partially baked tart crust.
2. Pour the custard onto the side of the tart
3. Randomly place the cubed pieces of butter onto the tart
4. Bake in a 350 degree F oven for around 30-35 minutes, until the custard looks set.
5. Serve over vanilla ice cream and enjoyyy!

KITCHEN NOTES: Don’t fill the pie with the custard all the way to the top, as it might spill during baking. Bake your tart  on top of a sheet pan so in case that the custard does drip, the sheet pan will catch all the drippings and you won’t have to slave over cleaning your oven. Also, don’t worry if the custard doesn’t seem completely set, the custard will set even further upon refrigeration.

After baking, I actually broiled the top of my tart for a few minutes to get that nice browning on the apples. It’s crucial to use firm texture apples or else they won’t hold up its beautiful shape during baking.

Hello folks! So sorry for the unexpected hiatus.

I was in Europe for a week during the first week of September. It took me awhile to get back into the groove of things, and I have been baking. Unfortunately, I didn’t think that any of the recipes I’ve tried so far are even worth sharing.  Hm..I think I’m in a bit of a baking slump. Don’t worry though, I’ve been researching recipes this week and I have a few that I might want to try….so stay tuned.

Since I don’t have any baking adventures to share with you, I thought I would share some pictures from my trip to Paris. I actually got to visit the shops of Pierre Hermes, Sadaharu Aoki, and Jacquines Genin.

I think a lot of people get tricked by the Hollywood image of Paris, where it’s the city of love, the smell of freshly baked croissants follows wherever you go, and all the other cliches. But in reality, Paris is pretty much New York City without all the skyscrapers. G almost got his wallet pick-pocketed and an Australian guy we met at the Louvre shared the story of his friend who got pepper sprayed in the eyes, then robbed. YIKES!

Funnily enough, the first macaron I had in Paris was at McDonalds…


..And they actually taste decent…

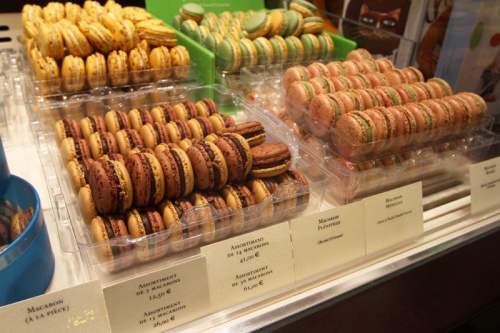
The first pastry stop was at Laduree, I only went in to look and did not purchase anything..


I couldn’t take any pictures of their famous macarons because photography is actually not allowed inside the store. What a shame, the store was decorated nicely. This store was inside the Louvre.

After the Louvre, we went to the Ponte Des Arts bridge where there are a ton of  “love” locks adorned on the bridge

G got us a lock for 5 euros. We signed it, locked it onto the bridge, and threw 2 of the 3 keys in the river (that’s what you’re supposed to do). Now I don’t remember where the 3rd key is!

Next stop was the chocolate shop of Jacques Genin…


As the French would say……Ohhh La La….


Afternoon tea… house pastry (back left) and 5 different flavors of cream puffs (front). It was chocolate overload…..but SO. YUMMY.

The next day, we visited Pierre Hermes to purchase some macarons.

The amazing looking pastries….but I’m here for the macarons..must resist!


Come to mama!!!


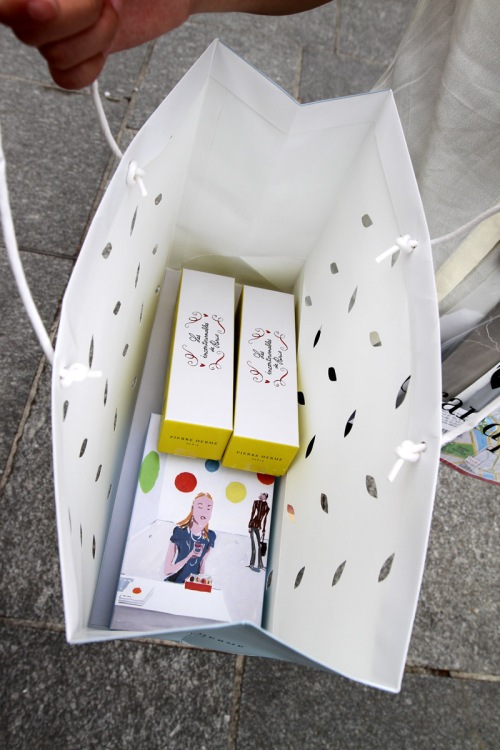
The goodies..such pretty boxes..even the bag was pretty.

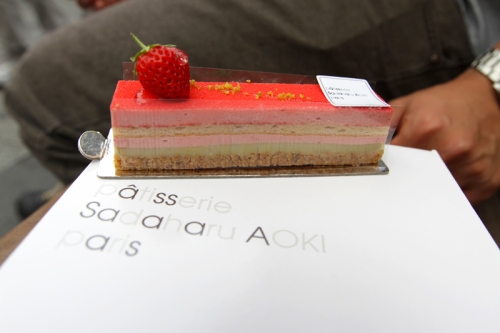
Then it’s off to Sadaharu Aoki.

Macaron tree. Cute..


We got the citron tart. The lemon definitely punches you in the face.  Really hard.

Strawberry and pistachio

Chocolate…this was my favorite one. Look at all the pretty layers..

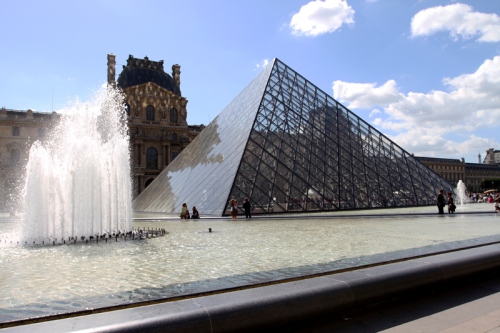
Overall the trip was fun, though a bit tiring. We also went to the usual touristy places like the Eiffel Tower and the Louvre.

The Eiffel Tower at sunset…it sparkles every hour on the hour.


View from the top of the Eiffel Tower


The Louvre at night…

I went to a specialty baking shop and bought some passionfruit extract and chocolate..


They had such a huge selection of everything..I could’ve stayed there for hours..
There was also a bakeware shop near by and again, I was in heaven.

Funky texture baking pans…haven’t seen these in the states yet.


Silicone baking mats….another endless selection


Chocolate mold trays…they were really heavy!

I totally would’ve walked out with a bunch of goods but all of their bakeware were most definitely on the pricey side!

Here are some more miscellaneous pictures…

G insisted we eat snails (another French cliche..)….I washed it down with A LOT of white wine.


Everyone wanting a picture of Mona Lisa…

And this is where my petite-ness comes into use….I managed to squeezed my tiny self to the front and take a picture

Outside the Louvre

A thrift shop I stumbled upon….Totally. Awesome.

Not sure if anyone is familiar with the movie Amelie, I personally have not watched it, but this is the cafe where Amelie worked in the movie..

Inside…

Lastly, this is the apartment where Vincent Van Gogh lived as a starving artist.

It was nice to sight see and visit all the famous pastry shops…everyone should visit Paris at least once in their lifetime!

Apologies for the short unannounced hiatus, I did not mean to deprive you of sweets. A post will be coming up in a few days..stay tuned!

One of the most perfect summer desserts is the fruit tart – it’s refreshing to eat and its vibrant colors make it look irresistible. This is one of my favorite desserts and I’m here to share the recipe with you!

Mmmmmmmmmm…. This was all gone in just 2 days…

I used home made vanilla pastry cream for this, but if you’re pressed for time, you can definitely substitute it for instant vanilla pudding. You don’t even have to use vanilla, chocolate would be tasty too!

So let’s cut to the chase!  The recipe:

Tart dough

1 cup butter, softened
1/2 cup confectioners’ sugar
2 cups all-purpose flour

1. In a large mixing bowl, cream together butter and confectioner’s sugar until light and fluffy.
2. Gradually add in flour, and mix until just incorporated.
3. Refrigerate for at least an hour before rolling out the dough onto an ungreased tart pan with a removable bottom.
4. Bake at 300 degrees F for about 25-30 minutes, until golden brown.
5. Cool before adding pastry cream and fruits.

KITCHEN NOTES: This tart dough is not too flaky, and I don’t think it’s meant to be. The texture is more like a shortbread cookie with a hint of sweetness from the confectioners sugar. If you prefer a flaky tart dough, you should use a different tart recipe :). Also, if you’re a beginner dough roller, you gotta work really quick because this dough warms up very quickly due to the amount of butter in it.

Vanilla Pastry Cream,
Yields 2 1/2 cups

2 cups whole milk
1/2 vanilla bean (I used 1/2 tbsp of vanilla bean paste…you could just use 1/2 tbsp vanilla extract if you don’t have bean/paste)
1/4 tsp salt
4 tbsp cornstarch
1/2 cups sugar
2 large eggs
3 tbsp unsalted butter

Have a large bowl ready for cooling the cream, along with a sieve to strain the cream into the bowl.

1. Pour milk into heavy saucepan, split vanilla bean and scrape seeds into the milk. If using paste/extract, just pour it into the milk. Add salt as well.
2. Place over medium high heat and bring to just under a boil, stirring frequently so the milk doesn’t stick to the bottom.
3. Meanwhile, in a medium mixing bowl, whisk together the cornstarch and sugar. Add the eggs one at a time and whisk until smooth.
4. When the milk is ready, pour about 1/3 of the milk into the egg mixture, whisking constantly so the eggs don’t cook. Pour the egg-milk mixture back into the hot milk and continue to whisk over medium heat until it becomes thick, about 2 minutes. DO NOT BOIL THE MIXTURE!
5. Remove from heat immediate and pour through the sieve into your large bowl. Let cool for 10 minutes, stirring occasionally so a skin doesn’t form on top.

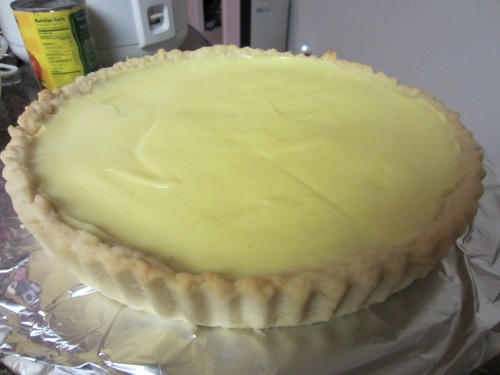
When both the tart shell and cream have cooled, you may begin assembling your gorgeous tart! Apologies for the low picture quality – I did not have my usual camera with me as G went on vacation to Europe for 2 weeks and took the camera with him!

I started with strawberries…

Then kiwis..

Then canned peaches around the kiwis, and finished off with blueberries!

Another great thing about fruit tarts is its versatility – you can use blackberries, raspberries mandarin oranges, mangoes, grapes, anything your heart desires!  The combination I used is my favorite though :).

After arranging your fruits, definitely brush a glaze on the fruits so it’ll look nice and shiny. The usual suspect is warmed apricot jam, but since I didn’t have that, I used the juices from the canned peaches, added a tablespoon of sugar, a squeeze of lemon juice, 1 1/2 tbsp of cornstarch, and tossed it in the microwave for a minute. This will create a thick glaze to brush on top of the fruits.

Hope you all enjoy!

You probably can’t tell from my blog, but I’m not too fond of macarons. The overall taste is just a bit sweet for me and it’s really hard for the filling to shine sometimes when it’s not something “in-your-face” like chocolate.

So why do I keep making them,  you ask? Because it’s a challenge for me, and I loooove to be challenged. I have yet to try the Swiss and Italian method of making macarons (I will when I stop being indecisive about which candy thermometer to buy), but my current challenge right now is to step out of the box when it comes to macaron fillings. The usual suspects for macarons are chocolate, caramel, or buttercream. Well, I found those fillings to be quite boring, hence the creation of my lemon meringue macarons. I liked them so much that I started to think about what other kind of macaron fillings I could make. Coincidentally, my coworker had given me a whole bunch of peaches from her tree, so I thought, why not make a peaches and cream macaron?!

………….And that I did………………..

The peach and cream flavors were certainly there, but just a bit overshadowed by the macaron shells. The problem is that you can’t put too much filling since it’ll just squirt out when you sandwich the macaron, so it’s hard to get enough in there to balance out the flavors of the shells. Maybe next time I will attempt to make a gigantic macaron sandwich so I can put more filling…..Hm…..interesting idea….

Anyways, I sprinkled some freeze dried strawberries on top, hoping they wouldn’t turn so brown but more of a dark peach color, but as you can see from the pictures, they did turn a bit too brown. It’s okay though, still adds some contrast of color to the macaron.

The recipe for the macaron shells is the same as my lemon meringue macarons. The only difference is I added a few drops of peach food coloring. I highly suggest reading that post if you’ve never made macarons before, or are new to it.

Vanilla Bourbon Cream

1/4 cup heavy cream
1 tablespoon sugar
1/2 teaspoon vanilla bean paste (you can substitute for vanilla extract)
A splash of bourbon

In electric or stand mixer, whip the cream, and add the vanilla, sugar, and bourbon as it begins to thicken. Continue to whip until soft peaks form, about 4 to 5 minutes. Refrigerate if not using immediately.

For the peaches, I used thinly sliced pieces of fresh peaches.

If you want to sprinkle something on top of the macaron shells like I did, do it right after you pipe the shell onto your baking sheet.

Refrigerate the macarons in airtight container right after assembly, and remember that macarons taste better after they’ve aged for at least a day in the fridge!

What other flavors should I attempt next?

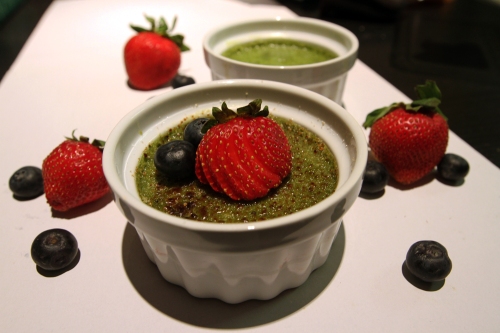
I first had green tea creme brulee at a local Japanese restaurant and thought it was a genius idea. I love green tea, and always have matcha powder on hand, so tadaaaa…..


ooooohhhhhhhhh……

I think this recipe is a keeper. I basically used Alton Brown’s creme brulee recipe and added a tablespoon of matcha powder into the heavy cream. It came out creamy and full of green tea flavor. Next time I might try a lavender infused creme brulee.


The recipe called for 1 vanilla bean, but I wanted to try out the vanilla bean paste that I bought recently. It’s like a syrup that has a bunch of vanilla seeds in it….it smells so good.


You can find this on amazon, but they are a bit pricey. 4 oz for around $10. 1 tbsp of paste = 1 tbsp vanilla extract = 1 vanilla bean. I’m excited to make vanilla cupcakes with this!!


The recipe said it serves 6 servings, but it was the perfect amount for 4 of my ramekins. Skim off the foam before baking it, or else the texture on top will be a bit weird.

Vanilla Green Tea Creme Brulee:

Creme brulee recipe from Alton Brown

1 quart heavy cream
1 vanilla bean, split and scraped (I used one tbsp of vanilla bean paste)
1 tbsp matcha powder
1 cup vanilla sugar, divided
6 large egg yolks
2 quarts hot water

1. Preheat the oven to 325 degrees F.

2. In a medium saucepan, combine heavy cream, matcha powder and vanilla bean seeds and whisk over medium high heat boil until bubbles begin to form around the edges. If using vanilla bean, remove from heat and let sit for 15 minutes so the vanilla flavor can infuse into the cream. If using vanilla extract or vanilla bean paste, just turn off heat. You might want to strain the mixture because sometimes chunks of green tea powder will remain.

3. In a medium bowl, whisk together 1/2 cup sugar and egg yolks until thick and pale in color.

4. Begin adding the cream a little at a time while whisking continuously until all the cream is incorporated.

5. Place ramekins in a steep pan and pour enough hot (not boiling!) water into the pan until it comes halfway up to the side of the ramekins.

6. Bake 40-45 minutes, or until the creme brulee still trembles in the center when jiggled.

7. Remove ramekins from pan and refrigerate for at least 2 hours. Creme brulee usually takes 24 hours to fully set.

8. Add and torch sugar just before serving. Add 1 tablespoon of sugar to each ramekin and use a kitchen torch to melt the sugar. Allow creme brulee to sit for at least 5 minutes before serving.

Yay. Another recipe crossed off my bucketlist. Bon appetite!

Hello all! Greetings from Tahoe. Currently there for the weekend for a mini vacation. Not much to do here except take pictures of the scenery!

Anyways, for those who read my last post, I posted a picture of what this post would be. For those who have no idea what it is – it’s macarons! Lemon meringue macarons to be exact.

I don’t particularly like to make macarons. It ususally requires so much powdered sugar that the shells always end up so sweet. I tried to offset it this time by using a lemon filling to balance the sweetness – it turned out pretty well. My best batch of macarons yet.

For those who aren’t familiar with making macarons – it is such a finicky process that requires zero room for error! When I first started making them it took 4 complete failures for me to get it right. So don’t be discouraged if yours don’t turn out well!

I will be posting a few links to sites that I used when I first started making macarons – one is a troubleshooting guide. I’m not going to spend too much time explaining how the process goes here, so please read the sites if you’re new to making macarons! Trust me. It helps ALOOOTTT.
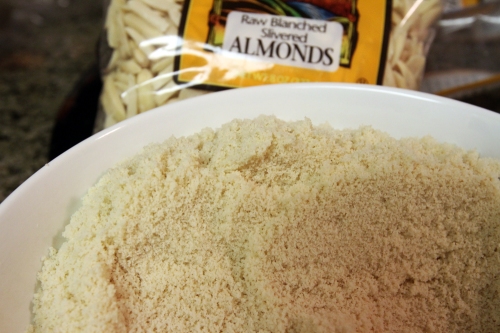
Almond meal made from bagged blanched almonds. I find that it’s cheaper to just buy a bag for around 2 bucks and ground your own using a blender/food processor. One whole bag of almonds from Trader Joe’s allowed me to make 3 batches of around 20 macarons!

Combine almond meal with powdered sugar and mix well. Some people like to sift everything again but I just use a whisk to combine everything.
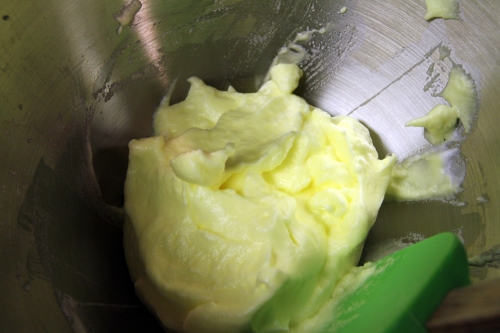
Whip meringue into firm peaks, not stiff peaks. If you want to make colored macarons,you can add it as you’re folding in the almond/sugar mixture, or you can add it when the meringue is about to reach firm peaks. Gel food coloring is best for this as it won’t alter the texture of the meringue. Here I added 2 drops of yellow food coloring.

This is the mixture after I’ve folded in the almond/sugar mixture. Sorry I didn’t take more pictures to show you. But it usually takes me around 20 folds to get the right consistency. The consistency should be lava like, where it creates a ribbon that disappears into the batter in about 10 seconds. I know that’s a crappy description, but I really feel that you won’t know how the right consistency is until you’ve made them a few times.

Piping the macarons on a silpat. I still need to work out piping! It gets all crooked and un-uniform in size as I pipe. Hah. I always do a test pipe on a plate or paper towel to practice – as you can see in the photo above – there’s a blob of macaron batter on a piece of paper towel..

Piped and resting – macaron shells need to rest at room temperature for 30-45 minutes so the top can dry, which creates the smooth top when baked!

Straight out of the oven. My favorite part of making macarons is when I peek into the oven 7 minutes into baking – to see that they’ve risen and the feet have formed. So exciting!
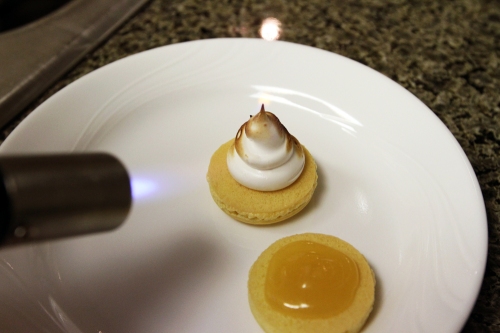

Toasting the meringue. Yum.
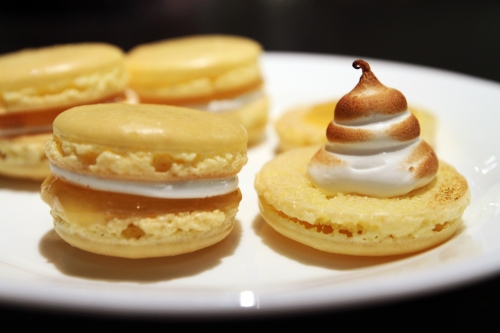
Finished product. So pretty!

KITCHEN NOTES: VERY IMPORTANT! The secret to macarons is to age them in the refrigerator for at least a day. The reason behind this is because, when the shells first come out of their oven. They’re chewy. You could bake them for a shorter amount of time to avoid the chewiness but it’s too risky to do since it’s very easy to underbake them. Once you underbake them, the egg whites inside the shell won’t rise – resulting in hallow macarons. So definitely err on the side of overbaking them! The logic behind the aging is because the moisture from the macaron filling will seep through the macaron shells – leaving it very moist, resulting in a soft macaron. So the point is, macarons straight out of the oven aren’t the best time to eat them; definitely fill it up with your desired filling, refrigerate for 24 hours, then bring to room temperature again before serving!

After much rambling, here’s the recipe:

Macaron shells, taken directly from Not So Humble

Makes around 50 cookies

5g dehydrated egg white powder
28g granulated sugar
225g confectioners (powdered) sugar
125g almond meal
100g aged egg whites

1. Combine almond meal and powdered sugar in a bowl. Whisk well.
2. In a stand mixer, beat egg whites until frothy.
3. Add egg white powder and granulated sugar and beat until firm peaks form. Add desired gel food color if necessary.
4. Fold a third of the almond/powdered sugar mixture into the egg whites. Fold a for about 10 times
5. Add the rest of the almond mixture and fold another 10 times. Until mixture becomes lava-like and creates a ribbon.
6. Pipe mixture onto baking sheet and let rest 30-45 minutes, until the top feels dry when you touch it.
7. Bake in a 300 degree F oven for 13-14 minutes.
8. Let cool before removing from baking sheet
9. Fill with desired filling and refrigerator for 24 hours. Or eat as many as you’d like.

Ah. Another very important thing about macarons!! You must age your egg whites at least 24 hours before using. I don’t know the science behind it, but something about evaporation that makes for a stable meringue.

There’s also been debate as to whether store bought pasteurized egg whites that come in a carton works when making macarons. Most of the sites I’ve read says it doesn’t work – but I tried it at least 3 times – and it worked very nicely! Up to you whether you want to experiment. I didn’t use the pasteurized whites this time as I didn’t have any on hand.

Lemon curd:

I used store bought lemon curd for this as it was too tedious to make along with the macaron shells AND the meringue topping.

Meringue filling:

2 egg whites
1/2 cup white sugar
1/4 teaspoon cream of tartar
1 teaspoon vanilla extract

1. Simmer 1 cup of water in pot.
2. In a heat proof bowl, combine egg whites and sugar.
3. Place bowl over pot of simmering water, making sure the bottom of the bowl does not touch the water.
4. Continue whisking egg whites and sugar until all the sugar has dissolved. You can test this by drizzling a bit of the mixture onto your finger and rub it between your fingers to feel if there are any more sugar granules. The whole process should only take 5-6 minutes.
5. After all the sugar has dissolved, transfer mixture into stand mixer bowl.
6. With the whisk attachment, whisk on low speed, then gradually increase the speed and beat until stiff peaks form, and the bowl is cool to the touch, About 7-10 minutes.
7. Transfer to piping bag and pipe onto macaron shells.
8. Torch frosting with kitchen torch (optional)

There you go folks. How can something with so little ingredients be so temperamental?! This definitely requires ALOT of patience and attention to detail when making! Here’s some websites that will be helpful to read before making macarons:

Not So Humble Troubleshooting Guide
Bravetart
David Lebovitz Macaron Guide
Bakerella Makes Macarons

Definitely read Not So Humble’s guide. She goes into such great detail on the anatomy of macarons, and her troubleshooting guide is SO helpful.

One last note, the macarons I made were French macarons. It’s just different in the way it’s made. Swiss and Italian macarons require a candy thermometer to make, which I don’t have, that’s why I use French. I’ve read that Italian method is the best for making macarons, but I can’t say since I’ve never tried.
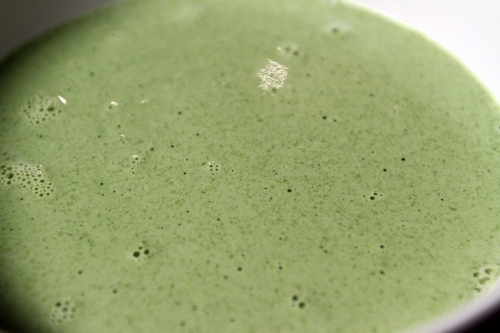
Here’s another sneak peek of the upcoming post…..you’re a genius if you can guess what it is 🙂
My birthday was a week ago and now I officially feel old. I think this is the first year that I didn’t get a birthday cake but it’s okay, it’s ’cause I didn’t want one! The closest thing I had to a cake was tiramisu at a restaurant. Hah. That reminds me. I need to attempt to make tiramisu soon.

I got an awesome gift from my sister Vivien for my birthday….guess what it is….

Hm….what could it be?!

……..Taaadaaa! Ice cream maker!

Sadly, I haven’t even opened it yet since I haven’t had time….plus, I’m still researching for the best ice cream/gelato/sorbet cookbooks! Any recommendations?

I’ll get to play with this soon enough…need to buy containers to store the frozen goodies….oh yeah, and also make room in the freezer!

The boyfriend was the one who got me my black KitchenAid 5 quart artisan mixer as a birthday gift. Thanks! (He reads this blog…not because I force him to 🙂 )

As my birthday dinner, the boyfriend decided to go to a restaurant that served foie gras.

California placed a ban on foie gras that took effect yesterday, July 1st. The reason was because the process of getting the foie gras was deemed inhumane. What foie gras is, is basically duck’s liver. Gross, right? But it’s a really fat liver – because it is forced fed corn so that the liver enlarges 10x its size. It is considered a French delicacy but very controversial due to the force-feeding…

Anyway, I’ve never had foie gras before, so I thought I would just try it before its banned…..
And here it is. Foie gras with toasted brioche, microgreens, and some sort of fig mixture in the back.

The foie gras just tastes like eating a slice of pure fat; with a hint of liver taste. Yuccck. It was not tasty at all! It didn’t help that there was a pool of oil surrounding the whole plate! I used the broiche to soak up the oil..haha. I didn’t want to waste it so I was kinda just forcing myself to eat it…the fig mixture did nothing to complement the foie gras! I think this is the kind of thing that you eat just to try, then you never eat it again.

Moving on….!! We also ordered:

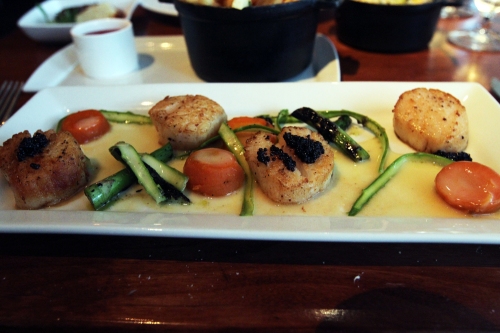
The Buzzard Bay scallops with asparagus, carrots, and American caviar. It was pretty good. Must do a version of this at home one day…….sans the caviar, of course. I’m not that fancy.

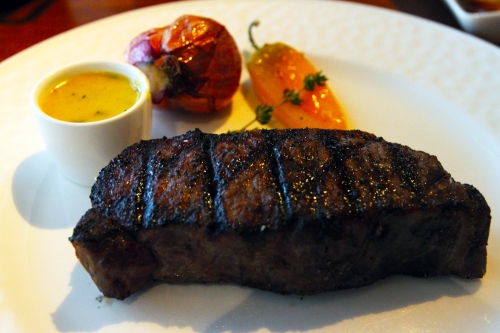
Dry aged New York steak – medium rare – with classic bernaise sauce (butter, vinegar, and wine mixed with tarragon and thickened with egg yolks). It was okay…not a big steak fan.


Duck fat fries. It didn’t taste anything special. It was just a bit salty.


Truffle Mac n Cheese. Sounds delish, right? But it was lackluster. I couldn’t taste the truffle and there was again a biiiig pool of oil that I had to dump out.

Overall the food was just “meh”. Meh meaning I don’t think I’ll ever go back again – unless someone else is paying for dinner :D.

I have another post in the works which will probably be completed by the end of the week. Here’s a sneak peek:

Yeeaah..I think it’s quite obvious what it is…did I ever mention that I love my cooking torch?

Apologies on the late post, things have been hectic.

Last week, in addition to the panna cottas, I also made chocolate fruit tarts.

This is the only picture of the finished product that I have..sorry! The filling is a baked chocolate cream. You can definitely substitute for regular pastry cream or chocolate pudding instead!

A crucial factor in making a flaky tart/pie dough is to keep ALL of your ingredients very cold. I like to measure out my butter/shortening/flour in a bowl, then toss it in the freezer for about 15-20 minutes.

I ran out of foil (no clue how that happened!) so I didn’t know what to use as pie/tart weights – until I saw my cupcake liners staring back at me. It was such a genius idea and worked perfectly. I amaze myself sometimes :P.

They came out flaky, but not as flaky as I had hope. I might have overworked the dough a bit while rolling it out! Eek!

The recipe:

Chocolate Fruit Tart

Tart dough(Yields two 9 inch tart/pie shells)

1 tsp salt
2/3 cup water, ice cold
3 cups all purpose flour
1 cup + 5 tbsp unsalted butter, very cold

1. In small bowl, dissolve salt and water. Keep ice cold until ready to use
2. Put flour in mixing bowl. Cut butter into flour until the mixture forms large crumbs and some of the butter is still the size of peas.
3. Drizzle in the ice cold water mixture and mix until dough begins to come together in a shaggy mass.
4. Gently mix until dough forms a ball, but is not completely smooth.
5. Divide dough into 2 equal balls and refrigerate for at least 2 hours.

KITCHEN NOTES: To pre-bake the shells, fill shells with pie weights and bake for 15 minutes in 375F oven.  For a fully baked shell, fill with pie weights and bake for about 25 minutes, until surface looks light brown. Remove pie weights and bake for addition 5-10 minutes. For this recipe, I pre-baked the shells first.


Baked Chocolate Filling

1 cup heavy cream
1/2 cup milk
10 oz semisweet chocolate, chopped
2 tbsp sugar
1/4 tsp salt
2 large eggs, at room temperature

1. Heat heavy cream and milk over medium heat until the edges begin to form bubbles. Do not let boil!
2. Remove from heat and stir in chocolate until melted and smooth
3. Beat eggs in a small bowl and add to chocolate mixture. Stir quickly until completely smooth
4. Pour filling into your pie/tart shell and bake for 15-20 minutes at 325 degrees.
5. If bubbles begin to form on the surface, take them out right away – they’re on the verge of being over baked. Let cool before adding fruits!

Garnish with your favorite fruits and serve!

For this recipe I made about 2 dozen small tarts and still had dough leftover. Next time I will have halve the dough and chocolate filling recipe.

I’m not sure what I’ll be baking next..I’m currently in Hades since it’s finals week and I’ve got much to finish. But one thing’s for sure; I’m totally addicted to MasterChef right now!!!!!!!!!!!

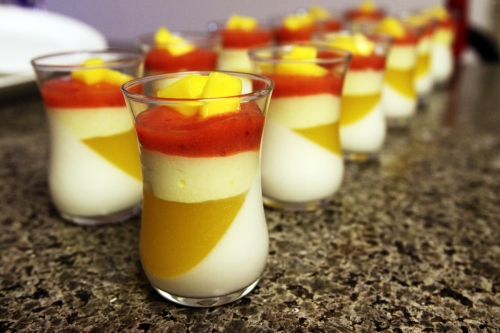
Hello folks! As promised from my last post, I used my adorable little glasses to make a beautiful little dessert:

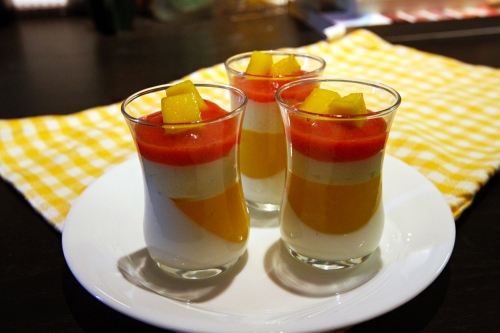
Vanilla Mango Panna Cotta!

Well, Vanilla panna cotta with mango gelee, mango mousse, and strawberry mango coulis to be exact. Hah, what a tongue twister.

These things are a bit tedious to make, as there are 4 layers to be made separately, and you have to wait for each layer to set before adding the next, but aren’t they pretty?

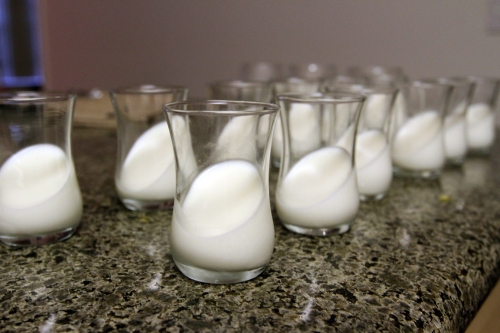
Start off by making the panna cotta. I decided to make a cool design by tilting the glasses as the panna cotta was setting

Folding mango puree into heavy cream whipped to soft peaks, to make the mango mousse

I used both Knox powdered gelatin and sheet gelatin for this. The sheet gelatin I bought when I was in Hong Kong…$3 US for a pack of 20! I have not been able to find these in the states. Above is the softened sheet gelatin.

I can’t get over how pretty they are. They remind me of those tropical drinks you get when you’re on vacation. Just need to add a fancy umbrella!

I also made some chocolate strawberry tarts for the potluck, but I will save that for the next post as the tart shell recipe needs a bit of tweaking.

Vanilla Mango Panna Cotta (Makes about 18 – 2.1 ounce cups, as seen in picture)

Panna Cotta

4 cups half and half
3/4 cup sugar
1 tablespoon vanilla extract, or 1 vanilla bean. split lengthwise with seeds scraped
2 packets powdered gelatin
6 tabelspoon ice cold water

1. In a bowl, empty 2 packs of gelatin, and add the ice cold water. Let sit for 5-10 minutes.

2. In the mean time, heat half and half, sugar, vanilla bean seeds (if using) in a saucepan over medium heat until the edges of the cream begin to bubble.
Remove from heat. If using vanilla extract instead, now is the time to add it!

3. Add the gelatin mixture into the panna cotta mixture, making sure the panna cotta mixture is very warm so the gelatin will dissolve. Stir until completely dissolved.

4. Divide panna cotta evenly into cups and refrigerate for at least an hour. You’ll know its safe to add the next layer when you jiggle the cup and the panna cotta doesn’t go anywhere.

Mango Gelee

1 1/2 cup mango puree
2-3 tablespoon sugar to taste, depending on how tart your mangoes are
1 packet of powdered gelatin
3 tablespoon ice cold water

1. Soak powdered gelatin in 3 tablespoon of ice cold water for about 5-10 minutes
2. In a microwavable bowl, combine sugar and half of the mango puree and heat for about a minute. Stir to make sure sugar has completely dissolved
3. Add gelatin to the mango puree mixture. Stir until completely dissolved. Let cool completely.
4. Spoon mixture into your panna cotta cups, and refrigerate until set

VARIATION: You can also add diced mangoes to this as well if you want more texture.

Mango Mousse

1 1/2 cup mango puree
2-3 tablespoon sugar to taste, depending on how tart your mangoes are
1 packet of powdered gelatin
1 cup of whipping cream
3 tablespoon ice cold water

1. Soak powdered gelatin in 3 tablespoon of ice cold water for about 5-10 minutes
2. In a microwavable bowl, combine sugar and half of the mango puree and heat for about a minute. Stir to make sure sugar has completely dissolved
3. Add softened gelatin to the mango puree mixture. Stir until completely dissolved. Let cool completely.
4. Using a stand or hand mixer, beat whipping cream until soft peaks form.
5. Fold in mango puree.
6. Spoon into panna cotta cups and refrigerate

Strawberry Mango Coulis

Honestly, I imrpovised for this one. I had some mango puree left over, but it was not enough to top off all my panna cotta cups, so I pureed about 7 strawberries, and combined it with the mango puree, along with some sugar. Coulis is just a really fancy word for fruit puree and sugar, so you can be creative and use whatever fruits you want!

I hope you guys will enjoy this recipe as much as my coworkers and I did. It is such a great treat for summer time and a good alternative to the heavy cakes/pies.

If you decide to make this, send me your pictures! I want to see your creations :).

Stayed tuned for the chocolate tart!